SMC-PAD Setup
For the most reliable mapping, lights, and transport, install MidiSuite from M-VAVE, then load our official preset.
FoxyPads preset
Download FoxyPads.spc, then import it into MidiSuite. MidiSuite itself is provided by M-VAVE — use their official installer, not a third-party copy.
1. Install MidiSuite
Install MidiSuite from the official M-VAVE Downloads page. Either editor works with this preset:
- MidiSuite (new) — the current editor
- MidiSuite V1.3.7 — the previous editor
Connect the SMC-PAD over USB, open MidiSuite, and confirm the device is selected before you continue.
2. Import the FoxyPads preset
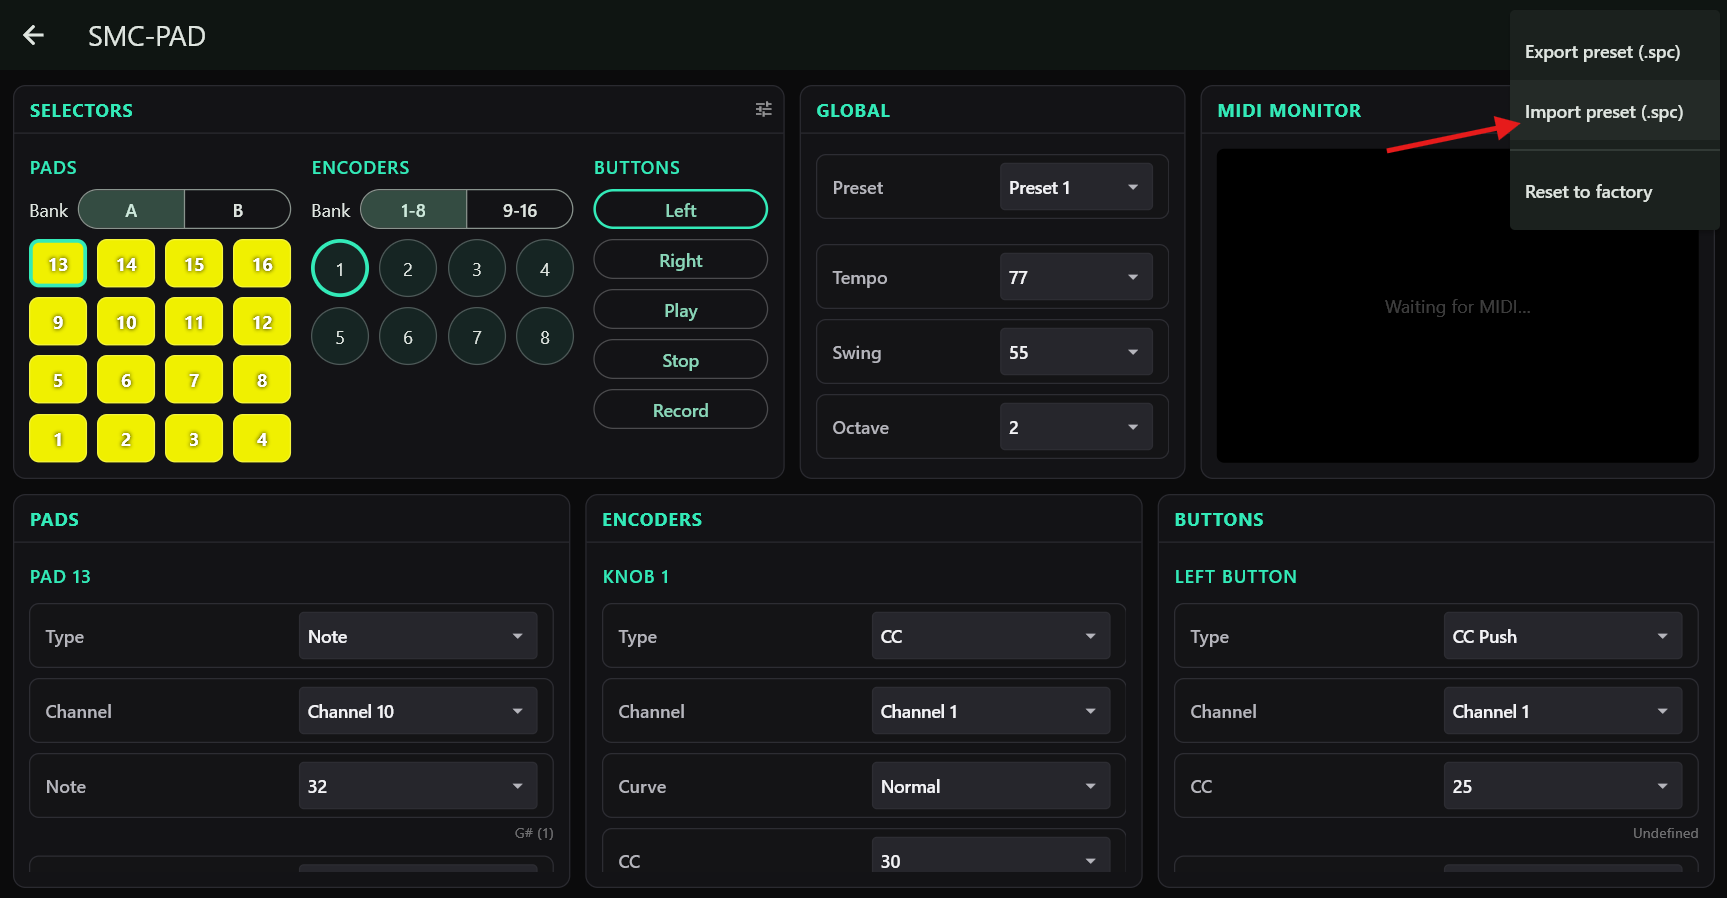
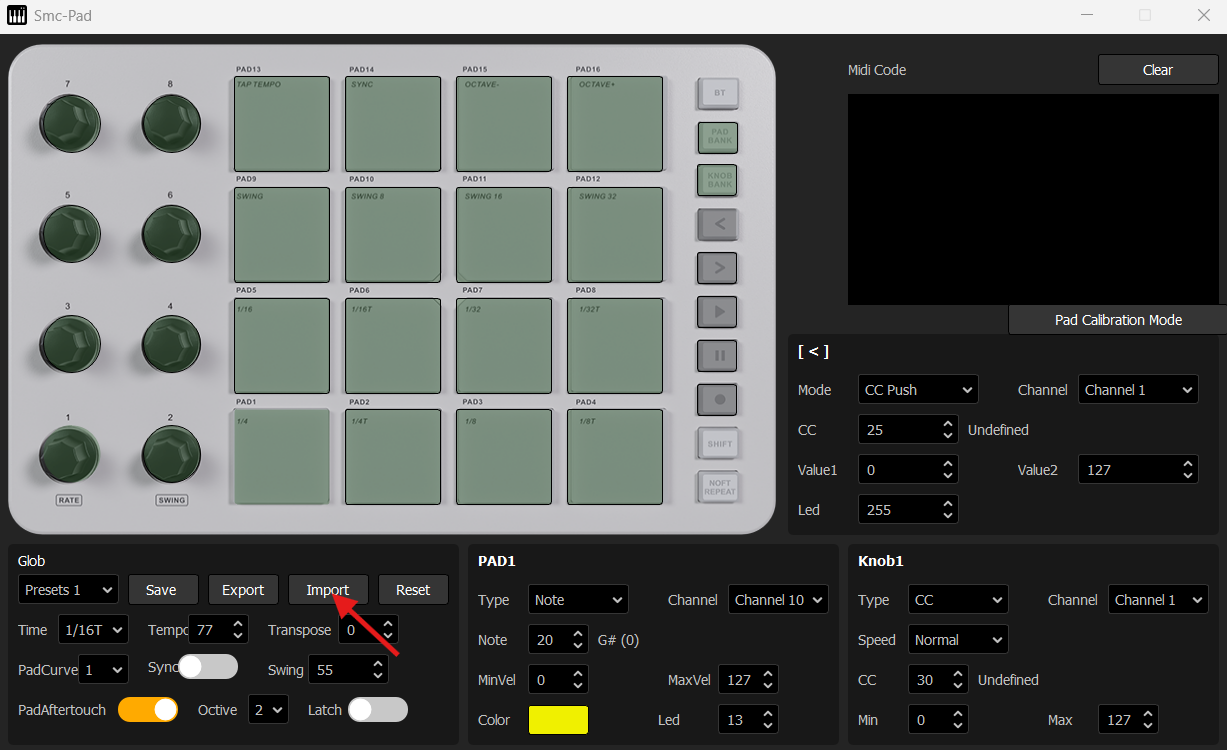
After downloading FoxyPads.spc, import it into MidiSuite:
- New MidiSuite: open the menu in the top-right corner and choose Import preset (.spc).
- Classic MidiSuite (V1.3.7): in the Glob panel, click Import.
Select the downloaded file and wait until the pads, knobs, and buttons update.
3. Load Preset 1 on the hardware
After import, recall the first preset on the device: hold Shift and press Pad 1.
4. Recommended device state
For correct mapping in FoxyPads:
- Stay on Pad Bank A (the first pad bank). Do not switch to Bank B while using FoxyPads.
- If you changed octave or transpose on the hardware, reset them:
- Reset transpose: hold Shift and press Pad 13 and Pad 14 together.
- Reset octaves: hold Shift and press Pad 15 and Pad 16 together.
5. Sync device tempo with the project
The SMC-PAD has its own internal tempo (Note Repeat, tap tempo, swing). For it to follow FoxyPads, both the device and the host must be set to sync.
Enable Sync on the device. In classic MidiSuite, turn on Sync in the Glob panel (next to Tempo / Swing). On the hardware you can also enable it from Note Repeat settings: hold Shift + Note Repeat, then press Pad 15 (Sync).
Send MIDI Clock from FoxyPads. In the Studio transport bar, enable MIDI Clock out. FoxyPads will then send MIDI Clock plus Start / Stop / Continue to the selected MIDI output, so the pad's tempo follows the project BPM.
If you use a DAW as well, enable MIDI Clock / Sync on the SMC-PAD output port (for example, in Ableton: MIDI Ports → the SMC-PAD output → Sync On). The device only follows tempo when the host is actually sending clock.